Microsoft PowerApps is part of Office 365 and provides users the ability to create and use mobile apps that are connect to data within and even outside of Office 365. PowerApps is a very powerful tool to help users on a day by day basis to do more, faster and easier. Every user can create basic PowerApps that can be used within in minutes, but the best Apps need a bit of customization.
PowerApps uses formulas, similar to Excel formulas, to create the desired behavior, design and interactions. In this blogpost I will share a couple of very useful customization, which we will be using quick often.
Search in a gallery
The default solution for search is that the value entered in the search box will search in the title field of the data in the gallery. This will already work when you created the PowerApp based on a SharePoint list
- Insert a Text input element
- Set the hint text to Search for items
- Set the default value to blank
- Set the Items property of the gallery to
Filter([Name of datasource], StartsWith(Title, TextSearchBox1.Text)
- The complete default code with sort funtion on the title field is as follows. You can use this if you have a button called SortDescending1.
SortByColumns(Filter([Name of datasource], StartsWith(Title, TextSearchBox2.Text)), “Title”, If(SortDescending1, Descending, Ascending))
Search on multiple fields
For searching on multiple fields it is easier to use the search function than the filter function. It is possible to do it with the filter function but it will become a very long and complicated formula.
- Insert a Text input element
- Set the hint text to Search for items
- Set the default value to blank
- The syntax of searching on multiple field is as follows
Search( Table, SearchString, Column1 , Column2, … )
- Set the Items property of the gallery to
Search(Tabel1_1, TextSearchBox1.Text, Title, Description)
Filter a gallery
Many PowerApp will use filters to provide users with a fast way to find the required data.
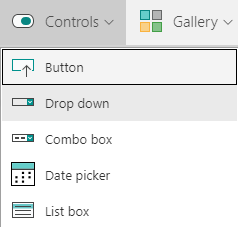
- Insert a Drop down control

- Name the drop down ddStatusFilters
- Connect the drop down to the status options, I will connect it to a collection called StatusFilters
- Create a collection called StatusFilters, that will be created on the Onvisible property of the screen
ClearCollect(StatusFilters,{Status:”New”},{Status:”Approved”},{Status:”Rejected”})
- Set the Items property of the drop down to
StatusFilters
- Set the Items property of the gallery to
Filter([Name of datasource], ddStatusFilters.Selected.Value = Status)
Filter and search combined
- Create a search control and a filter control, see examples Search in a gallery and Filter a gallery
- Change the Items property of the gallery to
Filter(SpecialistRequests, ddStatusFilters.Selected.Value in Status || TextSearchBox1.Text in Title)
- This will filter the status field on the selected filter in the drop down and filter the title field on the text in the search box.
Hide fields based on a condition
Field can be hidden based on a condition, this will help you make the form of a app more dynamic and easier to use. In this example we will hide the comment field if the status is new.
- Open the EditForm
- Change the Visible property of the Comment field to
StatusDataCardValue.Text<>”New”
- StatusDataCardValue is the name my DataCardValue assosiated with the Status field.


Hi Ben,
Having issues even getting the simplest of search functions to work?
Would you be able to assist me, doing my head in.
Thanks
Video link to screen recording:
https://streamable.com/6mlmy
I have watched the video, but don’t see anything wrong. The only difference is that is used a SharePoint list as a data source. But I don’t see why that would matter. Perhaps try a filter instead of a search formula.