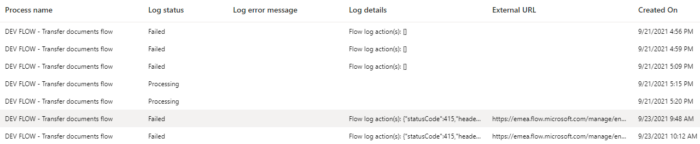
When managing multiple Power Automate Cloud Flows it can easily become a big task to figure out what went wrong and where. My client has more than 10 Cloud Flows that run multiple time per day or per hour. The solution is to create a log table (dataverse) or list (SharePoint) where all the runs are stored. The log table contains all the data an administrator needs to maintain the Cloud Flows. In my example I create a Dataverse table.

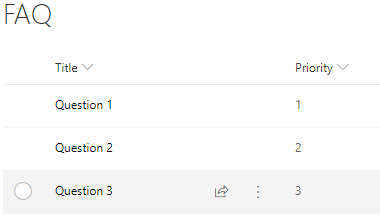
The Dataverse log table
In the log table we store the following data.
The Cloud Flow
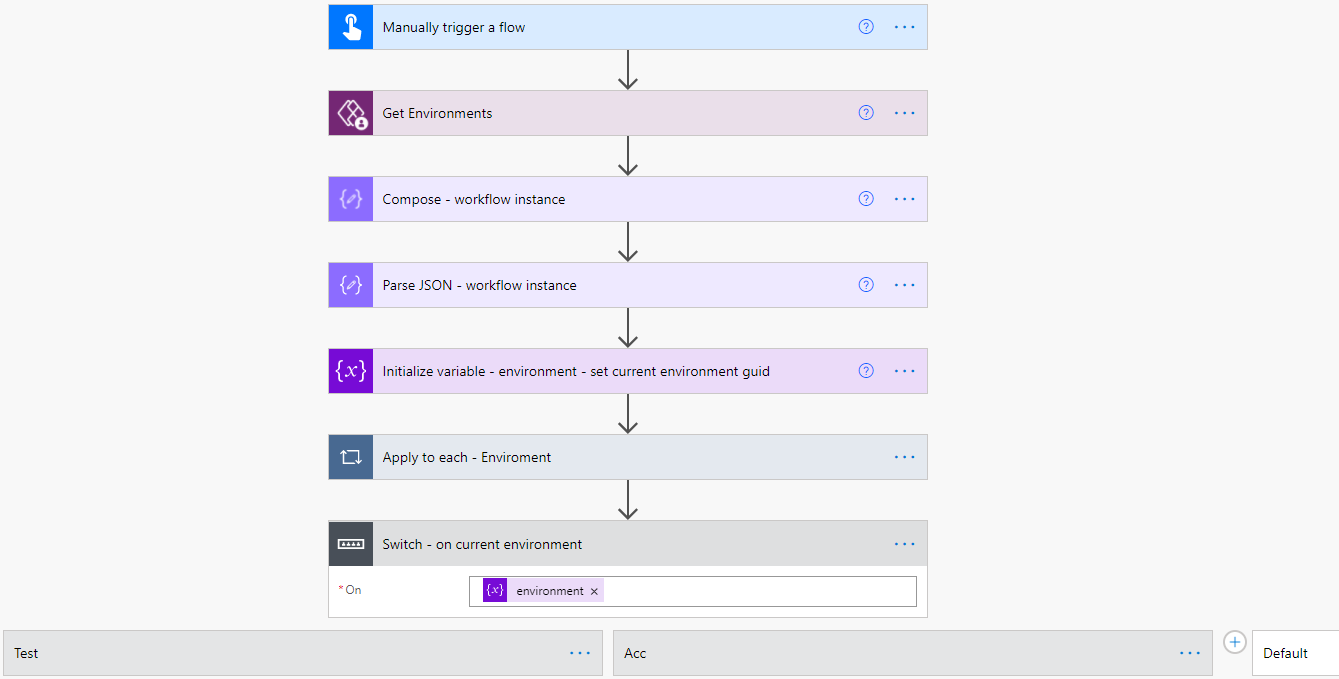
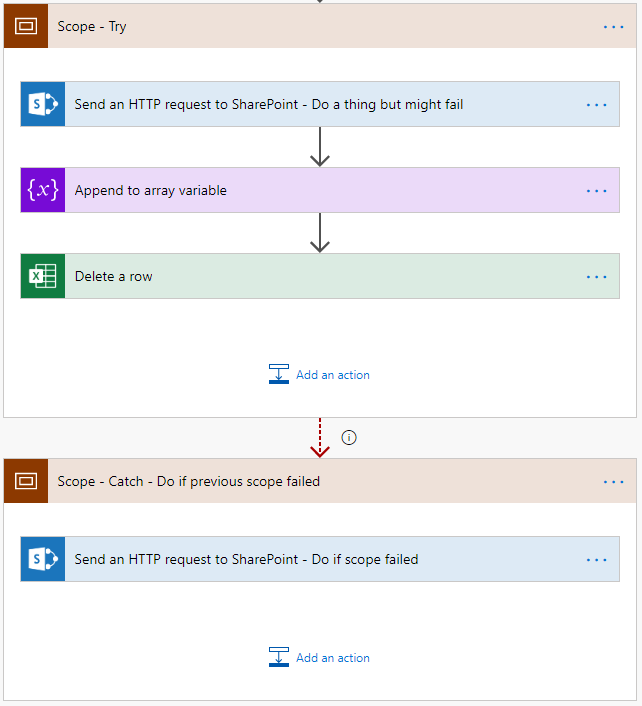
In every Cloud flow a try and catch scope is added. All the main actions are in the try scope, if one of these actions fails than the catch scope will be used.
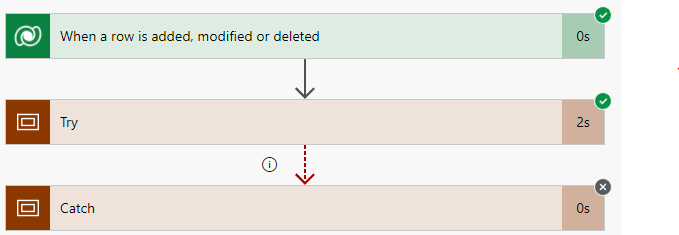
- Add a Scope with the name Try.
- Add the action the Dataverse Add a new row action.
- Select the log table by Table name.
- Select the Log status Processing, I use Processing, Failed and Successful.
- Add the Cloud Flow name to Process name.
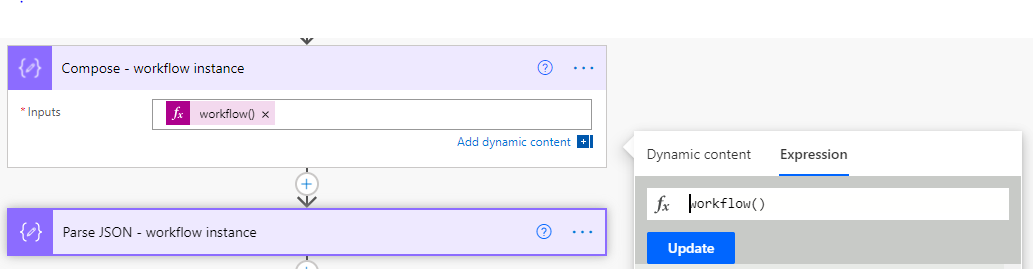
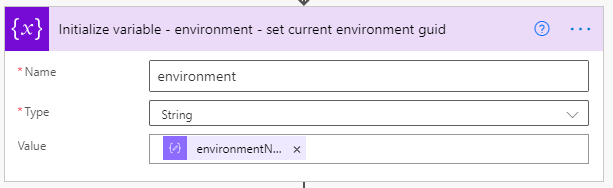
- Add the following code to the Environment field.
workflow()?['tags']?['environmentName']
- Add the following code to External URL, use the code snippets for the fx code.
This creates a link to the actual flow run.
workflow()?['tags']?['environmentName']
workflow()?['name']
workflow()?['run']?['name']

- Set the Status Reason to Active.

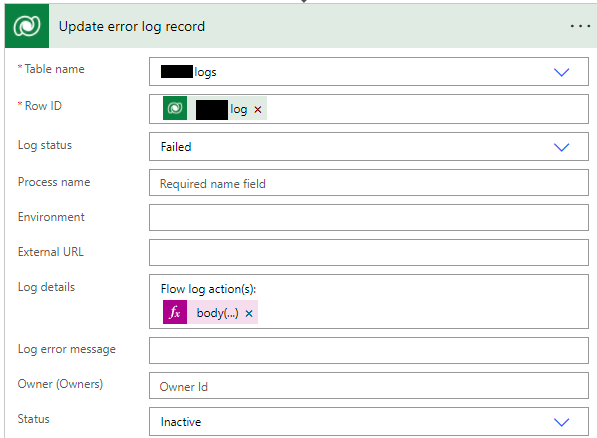
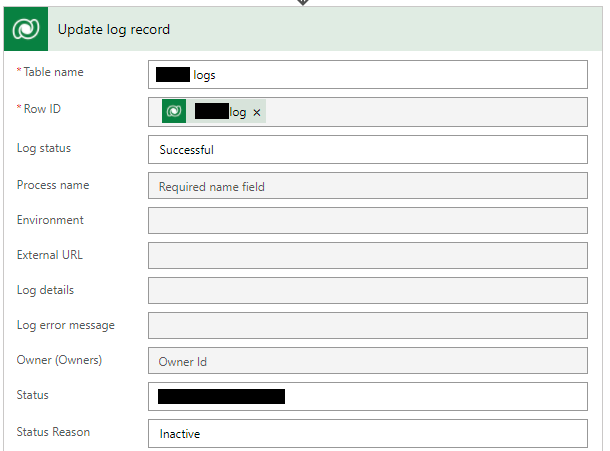
- Add the end of the try scope add the Dataverse Update a row action.
- Select the log table by Table name.
- Add the ID of the create log in the Row ID field.
- Select Successful in the Log status field.
- Add a Scope with the name catch.
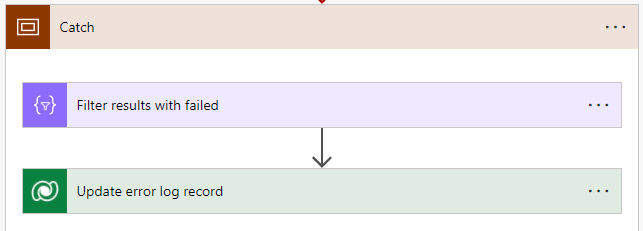
- Add the Filter Array action.
- Add the result of the try scope in the From field.
result('Try')
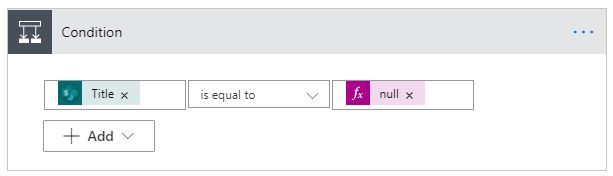
- Add the following filter Status is equal to Failed
item()?['status']

- Add the Dataverse Update a row action.
- Select the log table by Table name.
- Add the ID of the create log in the Row ID field.
- Select Failed in the Log status field.
- Select Inactive in the Status field.
- Add the following text to the Log details: Flow log action(s):
- Add the following code to the Log details, to show the error message from the try scope.
body('Filter_results_with_failed')[0]?['outputs']