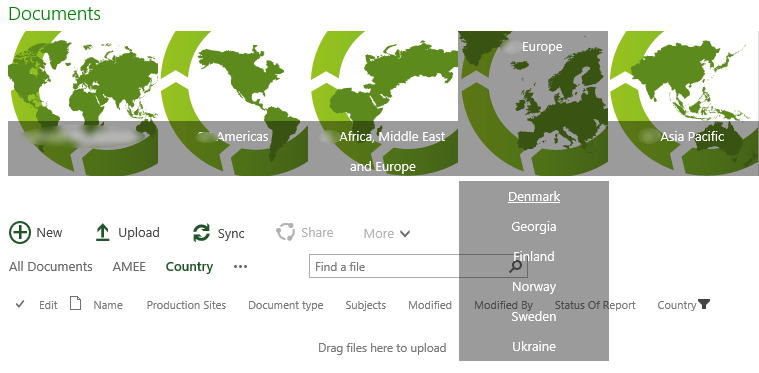
An international customer needed a good looking and user friendly navigation solution for a large set of documents. Users search for documents related to the region and country they work in. So we created an easy and good looking navigation focused on the regions and countries. The navigation element is added to the 5 region views and on the country view, allowing the users to easily navigate between regions and countries. The user hovers over a regions and the related countries will be shown.

Solution
The solution consists of two main parts, the country view with filter and the navigation element. First I will explain how the country view works, followed by the navigation element.
Country view
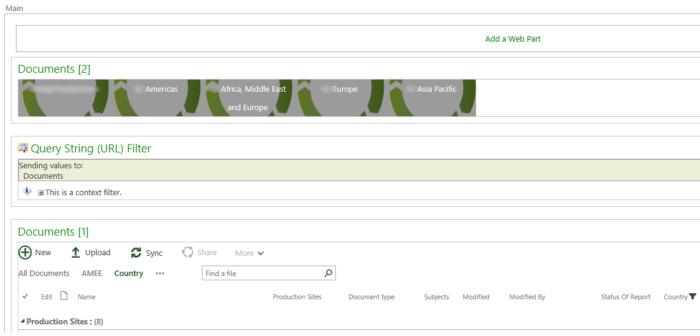
The country view uses an query string (URL) filter that is added to the view page. This filter takes the value of the parameter Country out of the URL and filters the document based on this parameter.
- Add the Query String (URL) Filter to the page.

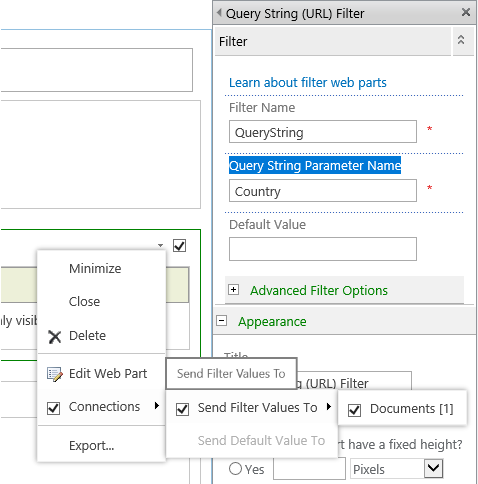
- Set the Query String Parameter Name to Country.
- Configure the Web part connection to send filter values to the document library.

- The documents will be filtered when you add the parameter with a value to the URL
?country=Denmark+(DK)
Navigation element
The navigation element consists of three parts, JavaScript, CSS and the HTML.
- Store the JavaScript, CSS and the HTML file on SharePoint.
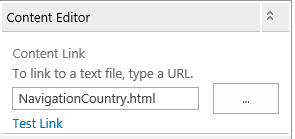
- Add a Content Editor Web Part to the country view page.
- Link the HTML file in the Content Link Setting

- The HTML page show the structure of the navigation, the pictures, links etc.
- The CSS file provided the looks.
- The JavaScript is used to activate the hover.
JavaScript and CSS working together
JavaScript controls the hover function (mouseenter and mouseleave), the hover is active on all elements (div) with the class top.
Only div’s with a region picture have the class top set.
- When the mouse enters the div, JS will add the class active to the div.
- When the mouse leaves the div, JS will remove the class active from to div.
$(document).on({
    mouseenter: function () {
        console.log('mouse-in');
        $(this).addClass('active');
    },

    mouseleave: function () {
        console.log('mouse-out');
        $('.top').removeClass('active');
    }
}, '.top');
When the class active is added the corresponding CSS is applied to the div, resulting in:
- The dropdown (div with URLs) will be shown.
- The div is hidden by default.
display: none;
- The div is hidden by default.
- The overlay on the region div will be set to full.
.top.active .bottom-container {
	display: block;
}

.active.top > a > .title {
	height:150px;
	top: 0;
}