Remove HTML markup with display templates

Display templates are used to show the queried results in a attractive and useful layout. With the CQWP we used XSLT to format the data as required, but with display templates we need to use JavaScript. One of my most formatted field is the publishing page content field. In this blog post I will explain how you can show the field without the formatting tags by using JavaScript.

Solution publishing page content
1. Edit the related Item Template.
2. Add the PublishingPageContent to the ManagedPropertyMapping. For a clean example I removed all mappings besides Title and PublishingPageContent.

<mso:ManagedPropertyMapping msdt:dt="string">'Titel':'Title','PublishingPageContent':'PublishingPageContentOWSHTML'</mso:ManagedPropertyMapping>

3. Create a variable for the PublishingPageContent column.

var PublishingPageContentHTML = $getItemValue(ctx, "PublishingPageContent");

4. The PublishingPageContentHTML will contain the page content but with styling. The following code will remove the styling.

var div = document.createElement("div");
div.innerHTML= PublishingPageContentHTML;
var PublishingPageContentL = div.textContent|| div.innerText|| "";

5. Us the code below to display the PublishingPageContent.

<div>
   _#= $htmlEncode(PublishingPageContent ) =#_
</div>

Result

CSWP Result

Custom date formats with display templates

Display templates are used to show the queried results in a attractive and useful layout. With the CQWP we used XSLT to format the data as required, but with display templates we need to use JavaScript. One of my most formatted field are the date fields. In this blog post I will explain how you can change the format of a date field by using JavaScript.

Solution date format
1. Edit the related Item Template.
2. Add the ArticleStartDate to the ManagedPropertyMapping. For a clean example I removed all mappings besides Title and ArticleStartDate in the code below.

<mso:ManagedPropertyMapping msdt:dt="string">'Titel':'Title','ArticleStartDate':'ArticleStartDateOWSDATE'</mso:ManagedPropertyMapping>

3.  Create a variable for the ArticleStartDate column.

var ArticleStartDate = ctx.CurrentItem.ArticleStartDateOWSDATE;

4. To be able to format the date we need to create a new variable of the type Date.

var localArticleDate = new Date(ArticleStartDate);

5. Us the code below to display the ArticleStartDate with the required format.

<div>
   _#= localArticleDate.format("dd-MM-yyyy")
</div>


Result

CSWP Result

SharePoint Default value for multi line column

By default SharePoint gives you the option to set the default column value for a lot of different type of columns. Unfortunately is this option is not available for the multi line column.
But with jQuery and a bit of JavaScript we can! This solution has been create in cooperation with Peter Heibrink.

Solution
1. Download the latest version of jQuery or the compressed jQuery
2. Save the Default Rich Text JavaScript to a JS file

<!-- 	TODO: Set reference to the jQuery.-->
<script type="text/javascript" src="[/...../jquery-1.10.2.min.js]"></script>
<!-- 	TODO: Set the varibale for the fieldname with the display name of the milti line column
	TODO: Set the HTML for the default value-->

<script type="text/javascript">
	jQuery(document).ready(function() {
		var fieldName="Body";
		var defaultText = "<b>Default value</b><br />This is the default rich text value...";
		if(jQuery('nobr:contains(' + fieldName + ')').closest('tr').find('input[id$="TextField_spSave"]').val() == "") {
			jQuery('nobr:contains(' + fieldName + ')').closest('tr').find('input[id$="TextField_spSave"]').val(defaultText);
		}
	});
</script>

3. Save jQuery and Default Rich Text JavaScript somewhere on SharePoint
4. Navigate to the SharePoint list where the multi line column needs a default value
5. Open the advanced library settings and set Launch forms in dialog to No.
DialogYesNo
6. Open the New item page for the list and edit the New item page
7. Add a content editor web part to the page with a Content link to the Default Rich Text JavaScript
ContentLink
8. Save the changed and add a new item!

Result
defaultRichValue

SharePoint 2013 How to add javascript to your site

In SharePoint 2013 is enriched with the Script Editor web part. The web part makes it very easy to add JavaScripts and Jquery script to your SharePoint 2013 site.

Solution

1. Edit the page where you want to use JavaScript.
2. Add the web part Script Editor.
3. Edit the web part Script Editor.

Javascript_2

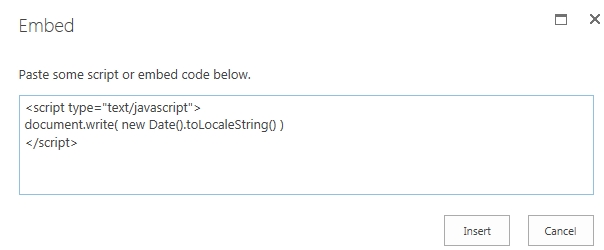
4. Insert the needed Javascript, in this example the JavaScript will show the current date and time.
Javascript_3
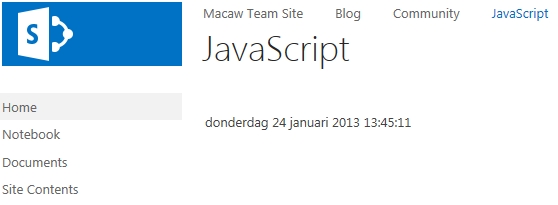
5. Save the changes and  enjoy the result.

Result

Javascript_4