Power Automate: Set email category

In a recent AI project, I developed a solution to evaluate every incoming email in a shared mailbox using an AI model (GPT with prompt). To inform users of the shared mailbox that an email has been processed, the email is flagged with a custom Outlook category. This process leverages a special HTTP action for Outlook, simplifying the implementation. Notably, there is no need to set up any special permissions if the flow owner already has access to the shared mailbox. This example does not cover the specifics of communicating with the AI through Power Automate.

Creating custom category in Outlook

  • Open Microsoft Outlook.
  • Click on Category in the Home Ribbon.
  • Click on All Categories.
  • Click on New.
  • Set a name and select a color.
  • Click on OK followed by Clicking on OK.
  • You have now created the custom Outlook category.

Setting the category with Power Automate

  • Create a new Power Automate flow with an outlook/email trigger. For example: When a new email arrives in a shared mailbox.
  • Add the Send an HTTP request action.
  • Set the URI to be following code.
https://graph.microsoft.com/v1.0/me/mailFolders/Inbox/messages/triggerOutputs()?['body/id']
  • Set the method to PATCH
  • Use the following JSON code for the body
{
"categories": ["AI Finished"]
}
  • Set the Content-Type to application/json.
  • Save the flow.

Office 2016: Outlook My Templates

Today I want to briefly talk about the My Template feature in Outlook. This  great add-in makes it very easy to create simple templates for emails. I used the old way (see below) but this was not very user-friendly. With the new feature you can create and use simple templates with a very user-friendly  interface. The major difference is that we cannot add images in these templates, perhaps this well be added in the future.

Create a template

  1. Create a new email.
  2. Click on View templates
  3. Click on + Template
  4. Type the information for the template and save the template

Use a Template

  1. Create a new email.
  2. Click on View templates and select the template
  3. If needed add more information and send the email

Old way: Create a Template

  1. Create a new email.
  2. Type the information for the template (e.g., all the standard information).
  3. Click File and choose Save as.  Specify the template File name and Save as file type Outlook Template (.oft).  Be sure to save it in the default location for Microsoft Templates.
  4. Close the email and do not save it when prompted.

Old way: Use a Template

  1. Choose New Items | More Items | Choose Form.
  2. In the Look In: box, select User Templates in File System
  3. Select the form you wish to use and click Open
  4. You can now type the needed information and click Send.

SharePoint 2013 The Site Mailbox

The site mailbox is a new app for SharePoint 2013 designed to work with emails and there attachments. With the site mailbox it is easy to store emails and documents on a team site to keep track of all the communications. The site mailbox will even be available in outlook to fully benefit from all the features. The Exchange 2013 Mailbox is synchronized with a SharePoint 2013 Site Mailbox, this means that you can work with the emails and document through the browser or Outlook.

Create a Site Mailbox

1. Create a Team site on SharePoint 2013.
2. Click on Keep email in context to create a new Site Mailbox.
Get started with your site
3. Click on AddIt
AddiT
4. The Site Mailbox Mailbox has been added.
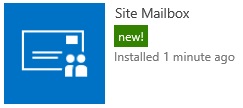
Site mailbox new
5. It will take a moment for SharePoint 2013 to create the Site Mailbox.
6. When the Site Mailbox is created it can take up to 30 minutes before the mailbox can be used. SharePoint 2013 will send an email to all the owners and members of the site.

File an email from Outlook

To file an email from Outlook to the Site Mailbox simple drag and drop the email to the sites inbox.
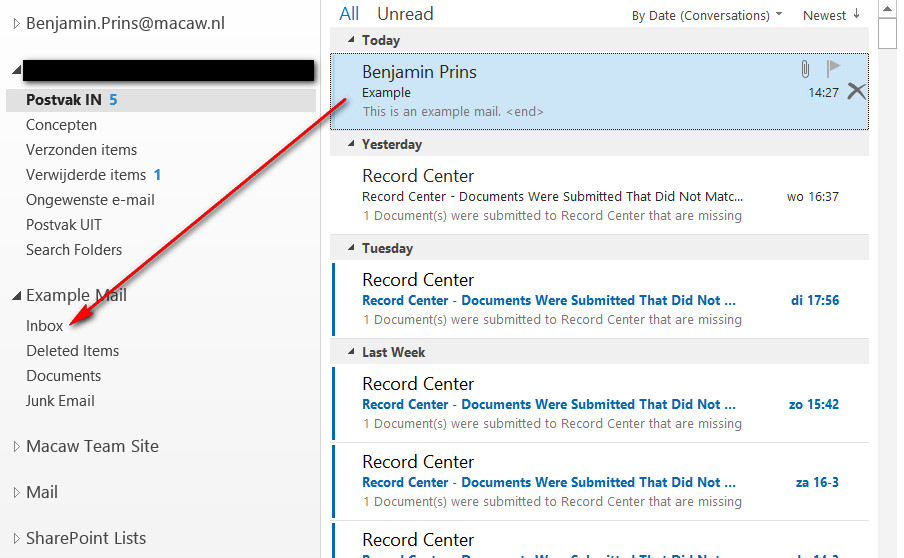
File email

File a documents from Outlook

To file a document from Outlook to the Site Mailbox simple open the email and drag and drop the attachment to the sites Documents library.
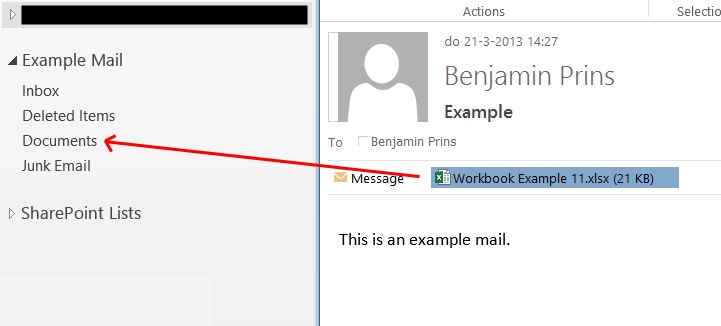
File document

Forward a document from the Site mailbox

With SharePoint it is no longer needed to email documents around, to distribute a document simple send the user a link. This will provide everybody with the same document without any versioning issues.
Right-click on a document and click on Forward to send an email with a link to the document.
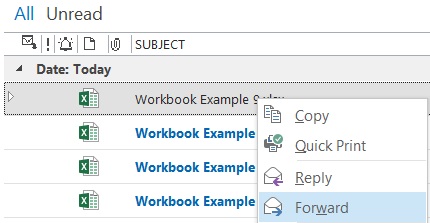
Forward a Document

Forward multiple documents from the Site mailbox

Forwarding a single document is nice, but forwarding multiple document with minimal afford is really cool.
Create a new Email and drag and drop the documents onto the email.
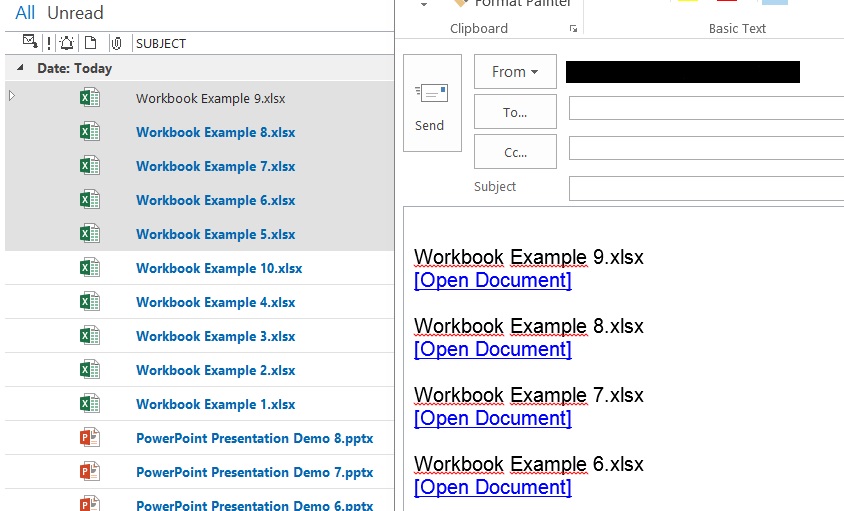
Forward Multiple Documents

Remove Site Mailbox from Outlook

When a project is finish or the team site is no longer need, you might want to remove the Site mailbox from Outlook. This will only remove the Site Mailbox from Outlook the content will still be available on the team site.
Right-click on the Site Mailbox and click on Close “Site Name” to remove the mailbox from Outlook.
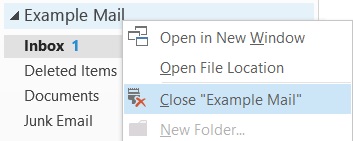
Close Site Mailbox

Manage all Site Mailboxes in Outlook

Right-click on the root mailbox associated with the SharePoint 2013 site and click on Manage All Site Mailboxes… to remove the mailbox from Outlook.
This will open a web page in the browser where you can select the Site Mailboxes that need to be shown in Outlook.
Manage All Site Mailboxes

Open the team site from Outlook

When working from outlook with the Site Mailbox there is a fast way to open the associated team site. Right-click on the document folder associated with the sites mailbox and click on Open in Web Browser to open the linked team site.
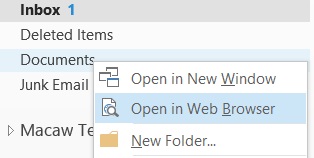
Open in Web Browser