For a customer I am creating Microsoft Flows to support various business processes. One Flow controls the process of reviewing and approving vital business documents. These documents are so important that during the day to day business the reviewers and approvers are unable to edit these documents. Only when the documents are in review a select few are allowed to edit them.
Microsoft Flow contains many default actions for all sorts of tasks, but
during the writing of this blog post there is no default action that can set permissions or break the inheritance.
In this blog post I will explain how set custom permissions, break the inheritance and restore the inheritance using the REST API.
Register app and grant app permissions
For the Flow to work we will need to Register an App and grant it permissions. During the registration of the App we will receive various id’s we will use in the Flow.
- Navigate to the app registration page on the SharePoint site.
https://<tenant>.sharepoint.com/_layouts/15/appregnew.aspx
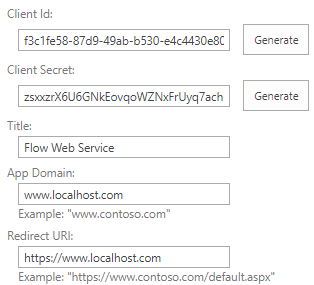
- Generate a Client ID and Client Secret.
- Set the Title to Flow Web Service
- Set App Domain to www.localhost.com
- Set Redirect URI to https://www.localhost.com
- Save the generated Client Id and Client Secret.
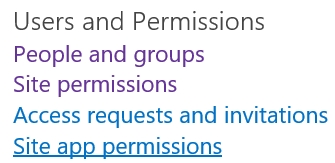
- Navigate to the Grant permissions to an app page. This must be done by browsing to the appinv.aspx page of the site.
http://<hostname>/<the Site Collection>/_layouts/15/appinv.aspx
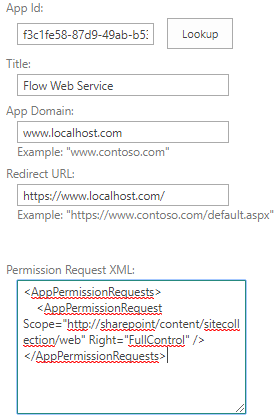
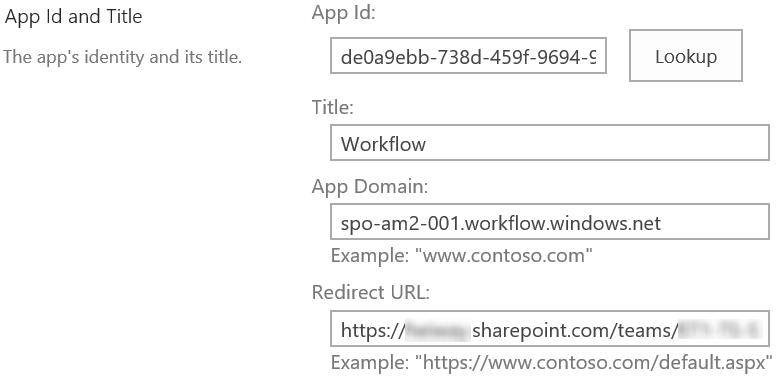
- Fill in the Client Id and click on Lookup
- Now we will grant the App full control access to the site collection.
- Set the following XML as the Permission Request XML
<AppPermissionRequests>
    <AppPermissionRequest Scope="http://sharepoint/content/sitecollection/web" Right="FullControl" />
</AppPermissionRequests>
- Click on Create.
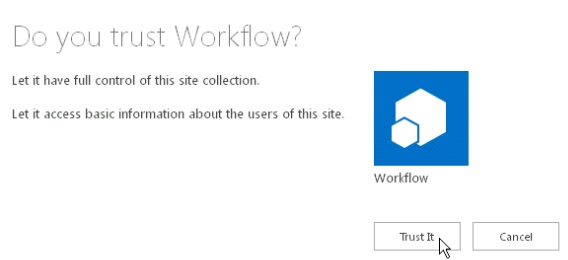
- A pop-up screen will appear asking to Trust the App, click on Trust It.
- The App has been granted permissions and can be used in the Flow.
Creating the Flow
- Create a Flow with the required trigger.
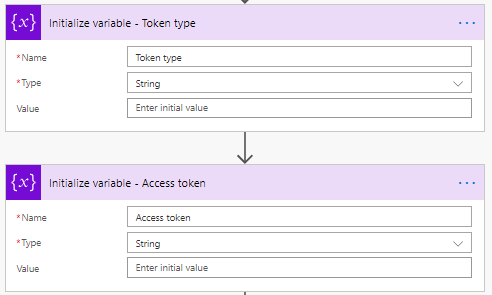
- Add two initialize variable actions for the Token type and Access token.
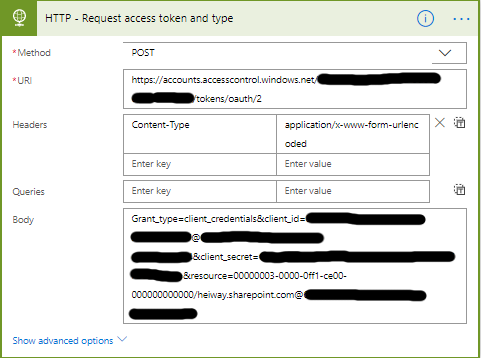
- Add the HTTP action to acquire the access token and type.
- Set the name to HTTP – Request access token and type
- Set the Method to POST.
- The URI is different for every tenant, you will need to your tenant id.
- https://accounts.accesscontrol.windows.net/<tenant ID>/tokens/OAuth/2
- Set the Headers as follows.
- The key is Content-Type
- The value is application/x-www-form-urlencoded
- For the body you will need the tenant ID, client_credentials, client_id and client_secret.
- grant_type=client_credentials&client_id=
<Client ID>@<Tenant ID&client_secret=<Encoded Client Secret>&resource=00000003-0000-0ff1-ce00-000000000000/<tenant>.sharepoint.com@<Tenant ID>
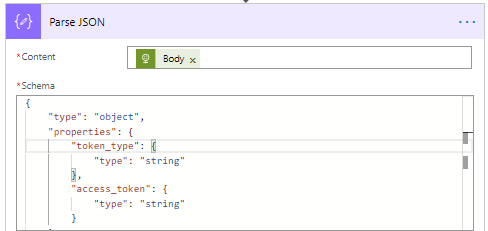
- Add a Parse JSON action.
- Set the content to the BODY (result) of the HTTP – Request access token and type action.
- Use the following Schema to parse the JSON.
{
    "type": "object",
    "properties": {
        "token_type": {
            "type": "string"
        },
        "access_token": {
            "type": "string"
        }
    }
}
- Set the variable Token type and Access token using the results of the parsed JSON.
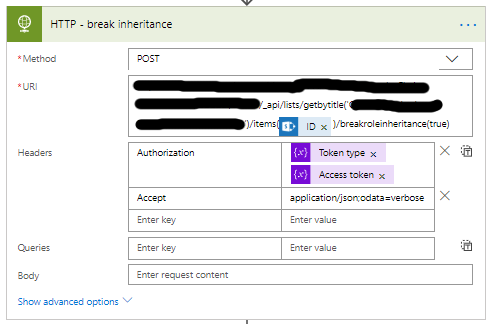
- Now you can break the inheritance, add a HTTP action.
- Set the name to HTTP – break inheritance.
- Set the Method to POST.
- The URI is different for every item/list you want to change.
- <site url>/_api/lists/getbytitle(‘<list display name>’)/items(<ITEM ID>)/breakroleinheritance(true)
- Set the Headers as follows.
- The key is Authorization
- The value is the Token type and Access token variable. Make sure to add a space between the variables.
- The key is Accept
- The value is application/json;odata=verbose
- Now you can grant an user permissions, I am granting the challenger (property of the item) contribution access.
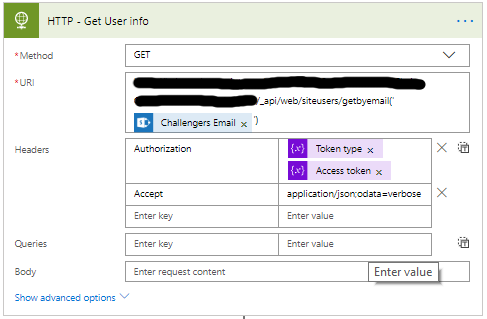
- Add a HTTP action, with this action we will get the users information.
- Set the name to HTTP – Get User info
- Set the Method to GET
- The URI is different for every location where you want to get the information from.
<site url>/ _api/web/siteusers/getbyemail(‘<Challengers email>’) - Set the same Headers as before.
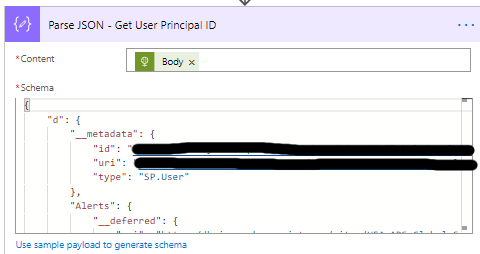
- Add the Parse JSON action, name is Parse JSON – Get User Principal ID
- Set the content to the BODY (result) of the
HTTP – Get User info action - Add the following Schema to the Use sample payload to generate the schema option.
- Make sure to enter your own account details.
{
  "d": {
    "results": [
      {
        "Id": 9,
        "LoginName": "i:0#.f|membership|<youraccount>",
        "Title": "<your name>",
        "PrincipalType": 1,
        "Email": "<youremail>",
        "IsSiteAdmin": true
      },
      {
        "Id": 14,
        "LoginName": "i:0#.f|membership|<youraccount>",
        "Title": "Example Title",
        "PrincipalType": 1,
        "Email": "<youremail>",
        "IsSiteAdmin": false
      }

    ]
  }
}
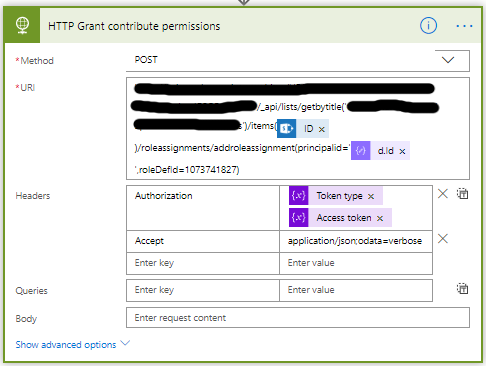
- Add a HTTP action, set the name to HTTP – Grant contribute permissions
- Set the Method to POST
- The URI is different for every item/list you want to change.
<site url>/_api/lists/getbytitle(‘<list display name>’)/items(<ITEM ID>)//roleassignments/addroleassignment(principalid='<d.ID>’roleDefId=1073741827) - The id 1073741827 stands for contributor, in my blog post SharePoint: Get the Role ID you can read more about role id’s.
- Set the same Headers as before.
- Now you can reset the inheritance if needed, add a HTTP action
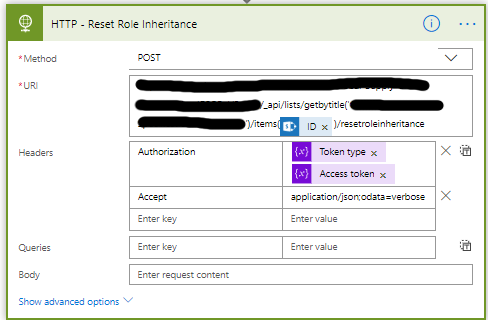
- Set the name to HTTP – Reset Role Inheritance
- Set the Method to POST
- The URI is different for every item/list you want to change.
<site url>/_api/lists/getbytitle(‘<list display name>’)/items(<ITEM ID>)/resetroleinheritance - Set the same Headers as before.
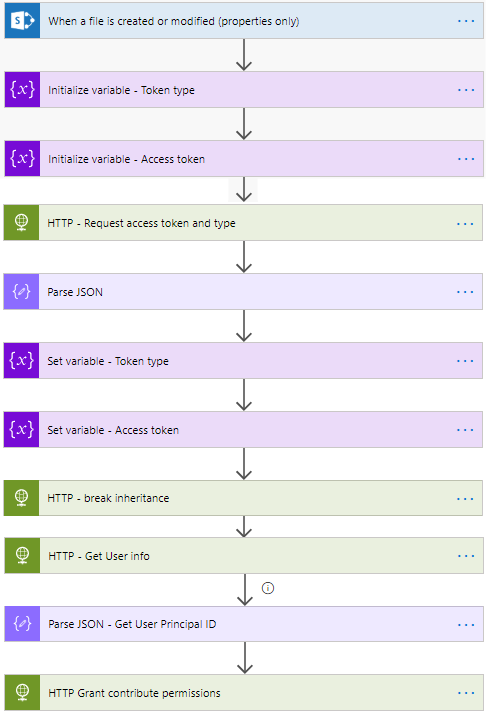
- Your Flow will now look like this.
