Add Power Fx buttons to model-driven apps

Model-driven apps, a fundamental component of the Power Apps suite, provide a robust framework for designing data-driven solutions. While they offer a wealth of functionality out of the box, adding customized actions and automations can greatly enhance the user experience and boost operational efficiency. This is where low-code Power Fx buttons come into play, providing a simple yet effective way to empower users to take control of their apps and automate routine tasks.

In this blog post, we will delve into the world of low-code development and explore how you can leverage Power Fx buttons to supercharge your model-driven apps. We’ll walk you through the process of adding a button that when pressed will save data in Dataverse.

Creating a Power Fx Button (command bar button)

  • Open your Model-driven app in edit modus.
  • Select … of the table (entity) where you need to add the button.
  • Click on Edit or Edit in new tab under Edit command bar.
  • Select the command bar that where the button needs to be added, in my case that is the Main form.
  • Click on Edit and the command bar will be loaded.
  • Click on New followed by Command to add a new button.
  • Change the label (name) of the button and place (drag) it to the correct location on the command bar.
  • If required select an Icon, selecting an icon help the user with recognizing the button and its function.
  • With the help of Power Fx code we can add when the button will be displayed (visible). For example; Only show the button when the the color field has the value Green.
  • Select the Show on condition from formula on the Visibility property.
  • Click on the Open formula bar, that appears below the property.
  • Add your Power Fx command that dictates when the button needs to be displayed.
If(Self.Selected.Item.color = "Green", true, false)
  • Click on Open formula bar under the Action property to add the Power Fx code that needs to be executed when the button is pressed.
  • Add your Power Fx command that needs to be executed, in my example it set the color field value to Purple.
Patch(Tasks,Self.Selected.Item, {color:"Purple"});
  • Click on Save and Publish when the button is ready.
  • Play the Model-driven app to see if the button is working correctly.

Retrieve Dataverse records with JavaScript

When validations or manipulations in a model-driven app are too complex for a business rule you can use JavaScript instead. With JavaScript you can use the Dynamics API to gather information and/or update records. JavaScript only runs on the interface; this means that the validation or manipulation only happen when a user is interacting with the model-driven app.

retrieveRecord

With retrieveRecord you can retrieve a records form a table if you know the ID.

Xrm.WebApi.retrieveRecord("account", "a8a19cdd-88df-e311-b8e5-6c3be5a8b200", "?$select=name,revenue")

Xrm.WebApi.retrieveRecord("TABLE", "ID", "?$select=COLUMN,COLUMN")

In this example a record from the table accounts is retrieved and the columns name and revenue are returned. If it was successful the results are displayed in the console, if an error occurred then the error message is displayed in the console.

Xrm.WebApi.retrieveRecord("account", "a8a19cdd-88df-e311-b8e5-6c3be5a8b200", "?$select=name,revenue").then(
    function success(result) {
        console.log("Retrieved values: Name: " + result.name + ", Revenue: " + result.revenue);
        // perform operations on record retrieval
    },
    function (error) {
        console.log(error.message);
        // handle error conditions
    }
);

retrieveMultipleRecords

With retrieveMultipleRecords you can retrieve multiple records from a table based on a filtering.

Xrm.WebApi.retrieveMultipleRecords("account", "?$select=name,primarycontactid&$filter=primarycontactid eq a0dbf27c-8efb-e511-80d2-00155db07c77")

Xrm.WebApi.retrieveMultipleRecords("[TABLE]", "?$select=[COLUMN],[COLUMN]&$filter=[COLUMN] eq ID")

In this example three records from the table accounts are retrieved and the columns name is returned. If it was successful the results are displayed in the console, if an error occurred then the error message is displayed in the console.

Xrm.WebApi.retrieveMultipleRecords("account", "?$select=name", 3).then(
    function success(result) {
        for (var i = 0; i < result.entities.length; i++) {
            console.log(result.entities[i]);
        }
        console.log("Next page link: " + result.nextLink);
        // perform additional operations on retrieved records
    },
    function (error) {
        console.log(error.message);
        // handle error conditions
    }
);

Expand query to get related records

With the $expand options we can retrieve related records of the record that was returned, this works for both retrieveRecord and retrieveMultipleRecords. Expand uses navigation columns (relationship/lookup) to retrieve the related records.

Xrm.WebApi.retrieveRecord("account", "a8a19cdd-88df-e311-b8e5-6c3be5a8b200", "?$select=name&$expand=primarycontactid($select=contactid,fullname)")
Xrm.WebApi.retrieveRecord("[TABLE]", "ID", "?$select=[COLUMN]&$expand=[NAVIGATION COLUMN]($select=[COLUMN],[COLUMN])")

Xrm.WebApi.retrieveMultipleRecords("account", "?$select=name&$top=3&$expand=primarycontactid($select=contactid,fullname)", 3)
Xrm.WebApi.retrieveMultipleRecords("[TABLE]", "?$select=[COLUMN]&$top=3&$expand=[NAVIGATION COLUMN]($select=[COLUMN],[COLUMN])", 3)

Asynchronous function to wait on the return

When using retrieveMultipleRecords you might need to use an asynchronous function. The function needs to wait on retrieveMultipleRecords to return the values before continuing with the function. You do this by making two async functions, one with the main logic and the second one which retrieves the records.

async function xseption(formContext) {
    var xseptions = await getXseptions(companyProfileId);
    //Do something with the return
}
async function getXseptions(guid) {
    var query = "?$select=rc_categorytypeid,rc_xseptionsid&$filter=_rc_related_companyprofile_value eq " + guid + "&$expand=rc_categorytypeid($select=rc_value)";
    var result = await Xrm.WebApi.retrieveMultipleRecords("rc_xseptions", query);

    return result;
}

Office 365: Lists

Lists in Office 365 is a powerful tool and it integrates perfectly in Teams or your personal OneDrive. You can use one of the list templates provide by Microsoft or create your own. The best way to use Lists is with Teams, then you can work together in real time with conversation and lists side by side. Track what matters most to your team using rules, reminders, and comments.

The bonus is that you can also create a Power App directly from the list. Now you can really use the list anywhere and anytime. The Power App can also be connected to the Team for easy access.

Lists in Teams

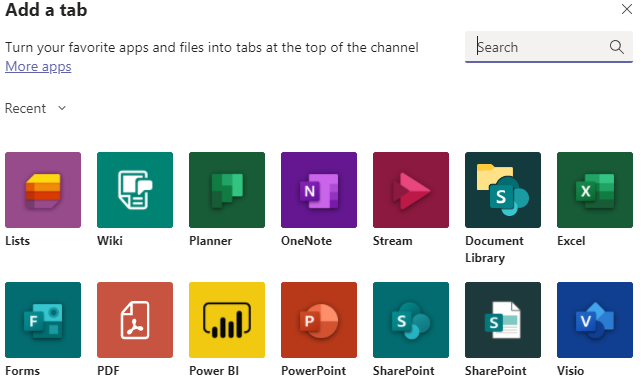
  • Add a Tab in Teams and select the List and click on save.
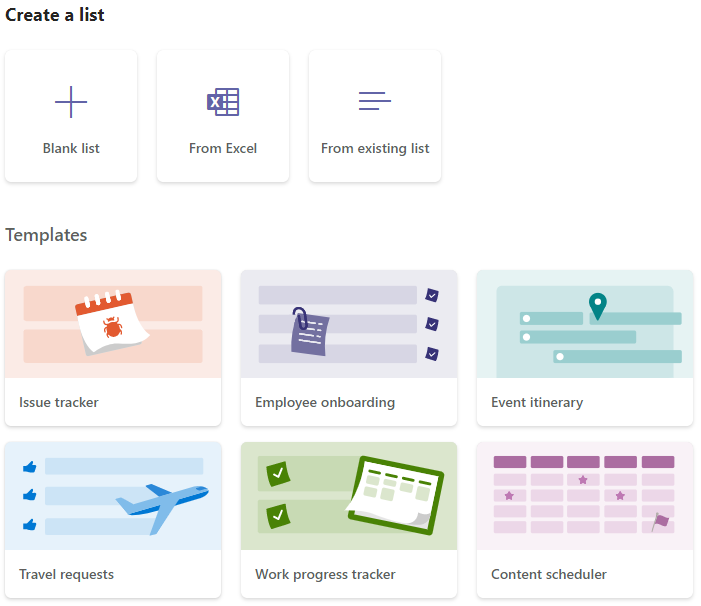
  • Create a new list.
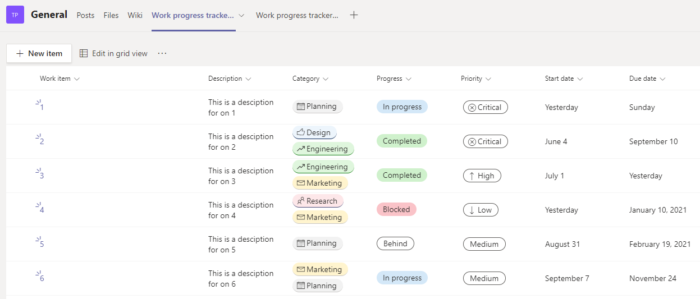
  • You can use a template or create a blank list.
  • Click on the Work progress tracker template and click on Use template.
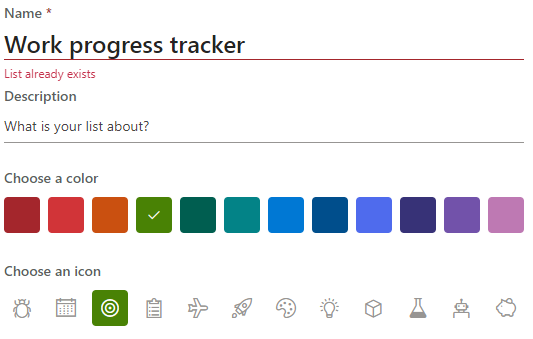
  • Fill in the name and description.
  • You have now create the List in Teams.

List with Power App in Teams

Its very easy to create a Power App based on a list. This Power App can also be added to Teams to be as productive as possible.

  • Navigate and open the Work progress tracker list.
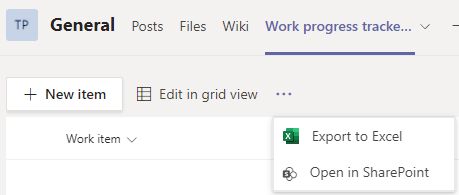
  • Open the list in SharePoint, this is the SharePoint site that is connected to the Team.
  • Click on Power Apps and Create an app.
  • Note that you can also create a Power Automate Flow for the list.
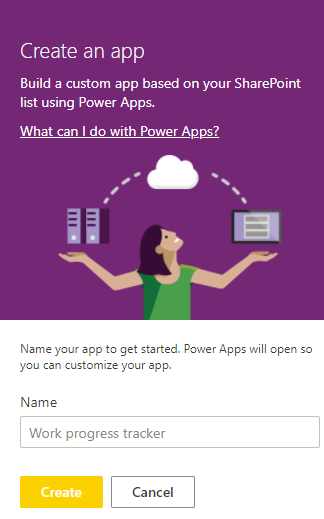
  • Fill in the name of the Power App and click on Create.
  • The app will be created, this process takes a few moments.
  • If required, you can change the Power App.
  • In this example I don’t change the Power App.
  • Navigate to the Team and add a Tab.
  • Find the Power App and click on Save.
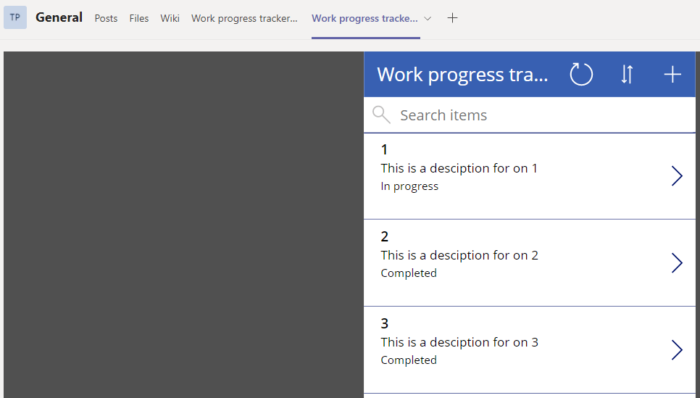
  • You can now use the Power App in Teams.

Lists in OneDrive

  1. Open Lists and click on New.
  2. Select a template or create a blank list.

3. Select the Work progress tracker and click on Use template.
4. Fill in the name and description.
5. The Save to location for your OneDrive is My lists.

PowerApp Search and Filters

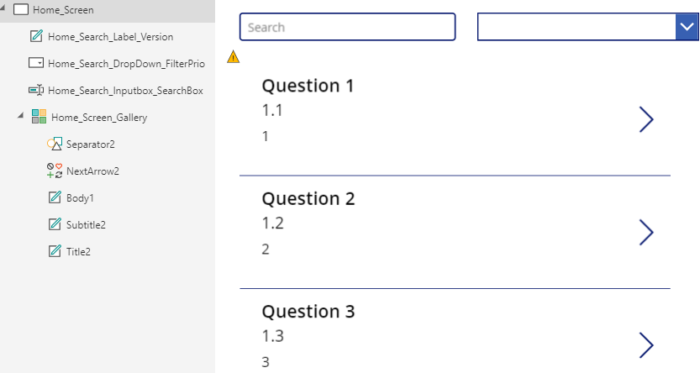
In PowerApps we often show lots of information and a good PowerApp will provide the user with the ability to find the relevant data quickly. We can do this by providing the user with search and filter capabilities. Therefore it not a surprise to me that I get many questions about searching in PowerApps. In this blog I will show various examples of search and filter solutions. I created a small PowerApp to support all the examples.

Small PowerApp

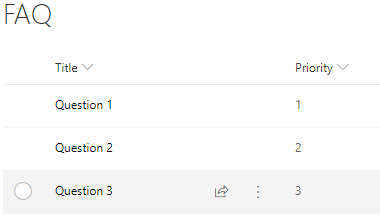
  • Create a SharePoint list called FAQ with the columns Title and Priority as a single line of text.
  • Create a Canvas PowerApp.
  • Connect the PowerApp to the FAQ list.
  • Add a gallery and connect it to the FAQ list.
  • Create a dropdown control for the filter.
  • Create a text input control for the search box.
  • Create the PrioFilterOptions on the OnStart of the Home_Screen.
    ClearCollect(PrioFilterOptions, "", "1", "2","3")
    
  • Connect the PrioFilterOptions to the dropdown control.
  • Add the following items to the FAQ list.
    • Title: Question 1, Priority: 1
    • Title: Question 2, Priority: 2
    • Title: Question 3, Priority: 3

Filter using contains

The most frequently  asked question is; How can I search using contains? It’s possible to search like this by using the in operator. In all my examples I will be using the in operator.

Filter( Table, value in Field )

Filter with a search box

A search box is a text input control, we can use this control as a search box.

Filter(FAQ, Home_Search_Inputbox_SearchBox.Text in Title)

Filter with a dropdown

Filter(FAQ, Home_Search_DropDown_FilterPrio.Selected.Value in Priority)

Filter with a searchbox and a dropdown

This example has a little issue, after selecting a dropdown value you can no longer filter only by using the search box. If you select the empty value then the filter will use that as a filter value.

Filter(FAQ, Home_Search_DropDown_FilterPrio.Selected.Value in Priority && Home_Search_Inputbox_SearchBox.Text in Title)

Filter with a searchbox and a dropdown (when not empty)

In this example the user is able to ‘deselect’ the chosen option from the dropdown. I recommend always using this example when using a dropdown filter.

If(IsBlank(Home_Search_DropDown_FilterPrio.Selected.Value),
Filter(FAQ, Home_Search_Inputbox_SearchBox.Text in Title),
Filter(FAQ, Home_Search_DropDown_FilterPrio.Selected.Value in Priority && Home_Search_Inputbox_SearchBox.Text in Title))


PowerApps: Use a SharePoint list for PowerApps Styling

When developing with PowerApps​​ we often want to store information in a SharePoint list and access the information in the PowerApp. The three main reasons are to store the styling code, settings or just for data storage. In this post I will explain how to connect a SharePoint list to PowerApp and use it for the styling of the PowerApp. You will have a central location to maintain the styling of one or multiple PowerApps.

Connect​​​​ to PowerApp

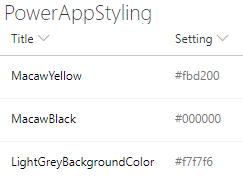
  1. Create a SharePoint list called PowerAppStyling ​with the following columns.
    • ​​Title (single line of text)
    • Setting (single line of text)
  2. Activate versioning on the SharePoint list.
  3. ​Create a PowerApp.
    • ​In my example I created a PowerApp from a SharePoint list.
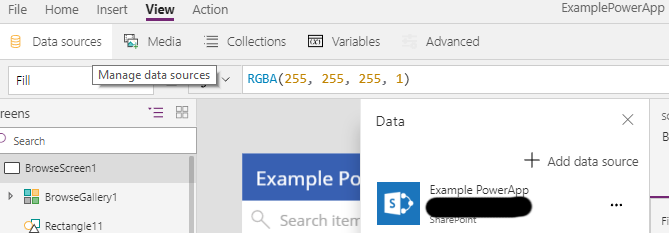
  4. ​Click on the tab View followed by Data sources.
  5. Click on Add data source.
  6. Click on SharePoint (for me the last option).
  7. Select the correct site or provide the URL and Click on Go.
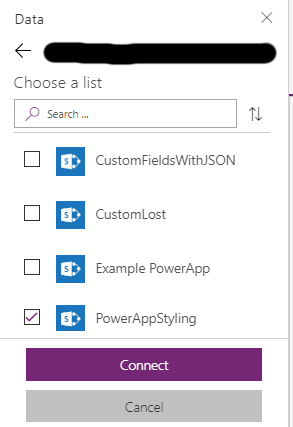
  8. Select the the list and click on Connect.
  9. The list is now connected and can be used in the PowerApp.

Use for SharePoint list for s​tyling

We need the styling as soon as the PowerApp starts, so we need to store the styling in a collection when the PowerApp launches. If you can avoid creating collection on startup do so. You want the PowerApp to laod as quickly as possible. ​In the SharePoint list add the required styling code. You can use the following example.

  1. Open the PowerApp.
  2. On the first screen, find the OnStart action.
  3. Create a collection called Collection_Styling to store the PowerAppStyling​ datasource.
  4. When accessing the styling code, always get it from the collection. This is faster than accessing the SharePoint list.
  5. Create a label called Label_Style_Example.
  6. Set the Text to This is my style.
  7. Set the font color of the label.
  8. Set the fill (background) color of the label.
  9. Set the border color of the label.
  10. Set the border color of the label.
  11. The label will now look all black because the Collection_Styling is still empty, the PowerApp has not been started yet.
  12. Run the PowerApp and see the result, sometimes you need to restart the PowerApp multiple times.

Office 365: PowerApps Examples of often used formula

Microsoft PowerApps is part of Office 365 and provides users the ability to create and use mobile apps that are connect to data within and even outside of Office 365. PowerApps is a very powerful tool to help users on a day by day basis to do more, faster and easier. Every user can create basic PowerApps that can be used within in minutes, but the best Apps need a bit of customization.

PowerApps uses formulas, similar to Excel formulas, to create the desired behavior, design and interactions. In this blogpost I will share a couple of very useful customization, which we will be using quick often.

Search in a gallery

The default solution for search is that the value entered in the search box will search in the title field of the data in the gallery. This will already work when you created the PowerApp based on a SharePoint list

  1. Insert a Text input element
  2. Set the hint text to Search for items
  3. Set the default value to blank
  4. Set the Items property of the gallery to
    Filter([Name of datasource], StartsWith(Title, TextSearchBox1.Text)
    
  5. The complete default code with sort funtion on the title field is as follows. You can use this if you have a button called SortDescending1.
    SortByColumns(Filter([Name of datasource], StartsWith(Title, TextSearchBox2.Text)), “Title”, If(SortDescending1, Descending, Ascending))

Search on multiple fields

For searching on multiple fields it is easier to use the search function than the filter function. It is possible to do it with the filter function but it will become a very long and complicated formula.

  1. Insert a Text input element
  2. Set the hint text to Search for items
  3. Set the default value to blank
  4. The syntax of searching on multiple field is as follows
    Search( Table, SearchString, Column1 , Column2, … )
  5. Set the Items property of the gallery to
     Search(Tabel1_1, TextSearchBox1.Text, Title, Description)

Filter a gallery

Many PowerApp will use filters to provide users with a fast way to find the required data.

  1. Insert a Drop down control
  2. Name the drop down ddStatusFilters
  3. Connect the drop down to the status options, I will connect it to a collection called StatusFilters
  4. Create a collection called StatusFilters, that will be created on the Onvisible property of the screen
    ClearCollect(StatusFilters,{Status:”New”},{Status:”Approved”},{Status:”Rejected”})
  5. Set the Items property of the drop down to
    StatusFilters
  6. Set the Items property of the gallery to
    Filter([Name of datasource], ddStatusFilters.Selected.Value = Status)

Filter and search combined

  1. Create a search control and a filter control, see examples Search in a gallery and Filter a gallery
  2. Change the Items property of the gallery to
    Filter(SpecialistRequests, ddStatusFilters.Selected.Value in Status || TextSearchBox1.Text in Title)
  3. This will filter the status field on the selected filter in the drop down and filter the title field on the text in the search box.

Hide fields based on a condition

Field can be hidden based on a condition, this will help you make the form of a app more dynamic and easier to use. In this example we will hide the comment field if the status is new.

  1. Open the EditForm
  2. Change the Visible property of the Comment field to
    StatusDataCardValue.Text<>”New”
  3. StatusDataCardValue is the name my DataCardValue assosiated with the Status field.