SharePoint 2013 Workflow: App step and App Permissions

By default workflows run under the permissions of the user that starts the workflow, even is the workflow starts on a change or when a new item is created. The initiator does not always have the right permissions to complete all the actions within the workflow. For example when the workflow needs to delete an item, create a new items or use a web service. With SharePoint 2013 workflows it is possible to use the App step action to give the workflow its own permission set.

Solution part 1: Activate the feature

  1. The feature Workflows can use app permissions needs to be active.
  2. Open the site settings and click on Manage site features
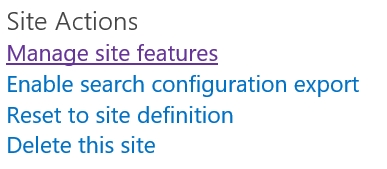
  3. Activate the feature: Workflows can use app permissions

Solution part 2: Grant workflow app permissions

  1. Open the site settings and click on Site app permissions
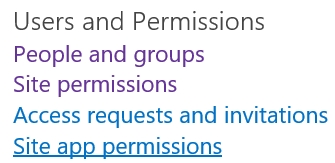
  2. Copy the client section if the App Identifier. This is the identifier between the last “|” and the “@” sign, as shown in the figure.
  3. Navigate to the Grant permissions to an app page.This must be done by browsing to the appinv.aspx page of the site.
    http://}hostname}/{the Site Collection}/_layouts/15/appinv.aspx
    
  4. Fill in the App Id and click on Lookup
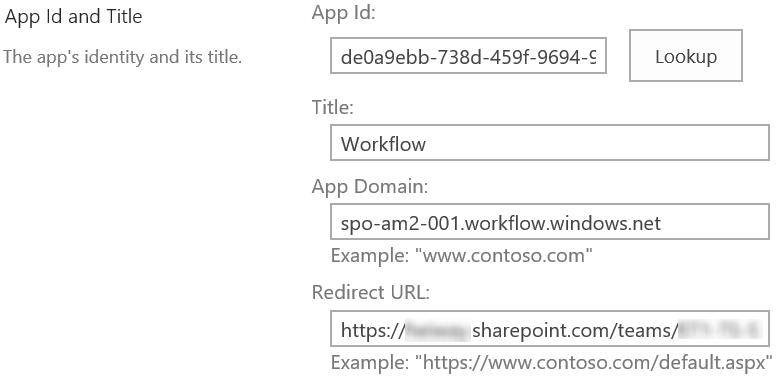
  5. The fields Title, App Domain and Redirect URL will be filled in automatically.
  6. Paste the following XML into the Permission Request XLM textbox to the grant the workflow App step full control
    <AppPermissionRequests>
        <AppPermissionRequest Scope="http://sharepoint/content/sitecollection/web" Right="FullControl" />
    </AppPermissionRequests>
    
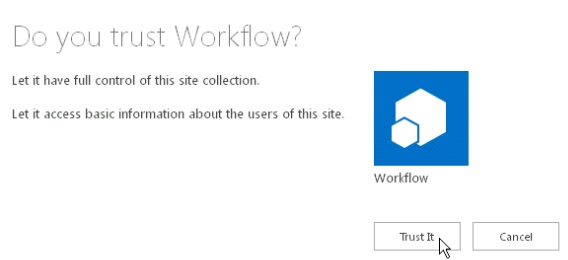
  7. Click on Create and on Trust It
Solution part 3: Using the App step

  1. Create a SharePoint 2013 Workflow with SharePoint Designer.
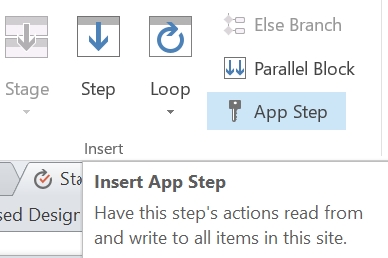
  2. Click on App Step in the ribbon to add the step.
  3. Add actions within the App Step and publish the workflow, for example:

SharePoint 2013 Workflow: Start a workflow using a REST call

SharePoint 2013 workflows do not have a default action to start another 2013 workflow. There is an action to start 2010 workflows, but for my solution I required the more advanced actions only available with SharePoint 2013  workflows. With the help of the call http web service action I was able to create a REST call that started the workflow. The solution was build on SharePoint Online (Office 365) using a SharePoint 2013 workflow.

The REST call workflow consist of three major parts;

  1. The HTTP web service URL
  2. The SubscriptionID of the workflow that needs to be started
  3. The itemID of the item on which the workflows needs to be started.

A side note: The workflow that is being started needs to be configured to start manually. I could not find any reference on MSDN about this, but without this option I would get an error message.

Solution

  1. Create a SharePoint 2013 workflow
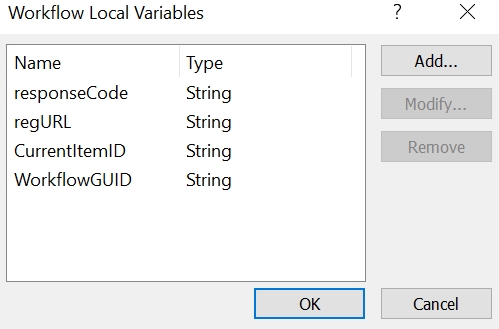
  2. Create a string variable called CurrentItemID
  3. Create a string variable called WorkflowGUID
  4. Create a string variable called regURL
    workflowvariables
  5. Now we need to find the SubscriptionID of the workflow we want to start. It is possible to use another REST call to find the SubscriptionID. But I prefer the following method.
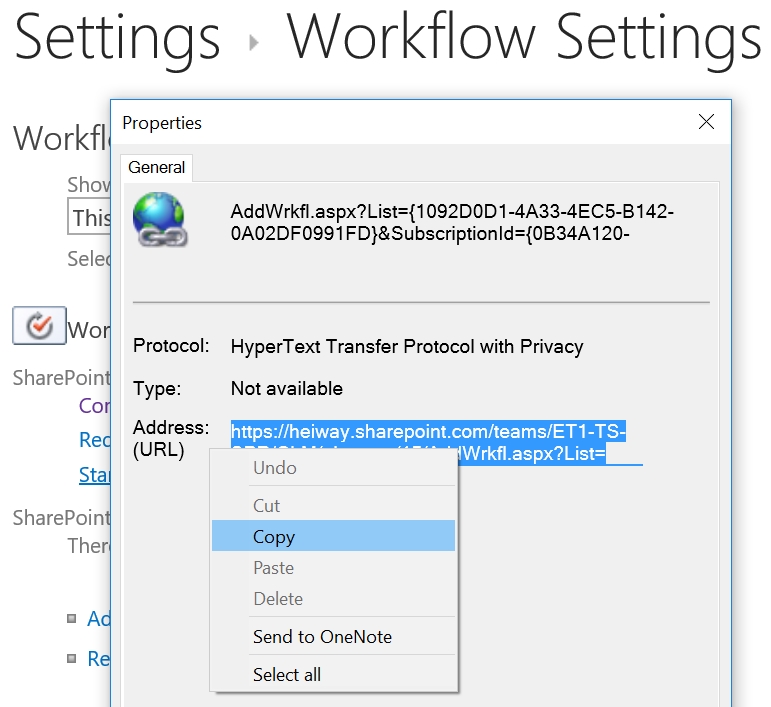
  6. Navigate to the workflow settings of the list where the workflow is located
  7. Right-click on the workflow and open the properties
  8. Copy the URL and find the SubscriptionID within the URL
    getsubscriptionid
  9. Set the variable WorkflowGUID with the found SubscriptionID
  10. Set the variable CurrentID with the ItemID of the current item or item on which the workflow needs to start.
    setvariables
  11. Then store the following URL to the variable regURL
    [%workflow Context: Current Site URL%]_api/SP.WorkflowServices.WorkflowInstanceService.Current/StartWorkflowOnListItemBySubscriptionId(subscriptionId='[%Variable: WorkflowGUID%]',itemID='[%Variable: CurrentItemID%]')
    
  12. Add the Call HTTP web service to the workflow and set the “this” to the regURL
  13. Set the HTTP Method to HTTP POST
    setcallhttpwebservice
  14. The workflow will now look like this
    fullwfstartanotherwf
  15. The app step is used to make sure the workflow has the required permissions. More details about the App Stepp will be explained in another blog post.


SharePoint Timer Job: Workflow Auto Cleanup Job

One of our customers uses workflows to review and approve important project documents. The project board members receive workflow tasks to approval for example the mandate and the project initiation documentation (PID). The customer uses a view to see if the approval workflow is running, complete or not used. After weeks of using the workflow the customer stated that all the workflow information of completed workflows is missing. This is a problem because the customer needs to be able to provide an audit trail of the approval process for important project document.

Cause
The cause of the seaming missing workflow information is the SharePoint timer job Workflow Auto Cleanup Job. The job is responsible for deleting related workflow tasks and the workflows status used in views. The job removes tasks that still exist 60 days after the workflow is completed or cancelled. This is done to prevent the task list to become too large and impact performance. The actual workflow information will not be removed and can still be accessed through the workflow history.

Solution
Because the required audit trail information is not lost we did not change anything to the timer job, to make sure no potential performance issues where introduced.
We introduced the following solution to overcome the default cleanup behavior.

  1. We added a step in the workflow that filled in an extra column, the column contains the information if the workflow has run or not.
  2. The column was removed from the edit page to make sure only the workflow changed the value of the column.
  3. We taught the customer how to use the workflow history, to gain easy access to the audit trail.

Disable the timer job (not recommended)
It is possible to disable the timer job. However, this is not recommended. Disabling the timer job creates a potential impact to performance.

Add new page button

SharePoint has multiple ways to add pages. It can be done in the document library (pages) or through the settings drop-down menu. For most users these are not the most practical and easy. An easier and faster way is to simply add a hyperlink or button on a page for user to click on. My favorite method is to add a button on the page in SharePoint style. The hyperlink I am using is exactly the same as the hyperlink in the settings drop-down menu.

ButtonAddPage

Solution with hyperlink only
1. Edit the page where the button needs to be placed.
2. Add a Script Editor web part to the page.
3. Add the following code in the script editor.

 <a onclick="if (LaunchCreateHandler(&#39;PublishingPage&#39;)) { SP.SOD.executeFunc(&#39;sp.ui.dialog.js&#39;, &#39;SP.UI.ModalDialog.showModalDialog&#39;, function() { var dlgOptions = { url:&#39;\u002fsites\u002fknowledge\u002fBestPractice\u002f_layouts\u002f15\u002fCreatePublishingPageDialog.aspx&#39;, autoSize: true, autoSizeStartWidth: 550 }; SP.UI.ModalDialog.showModalDialog(dlgOptions); }); };" href="#">  
      new page  
 </a>  

4. Publish the page.

Solution with button SharePoint style
1. Edit the page where the button needs to be placed.
2. Add a Script Editor web part to the page.
3. Add the following code in the script editor.

 <div class="ms-comm-heroLinkContainer">  
   <a onclick="if (LaunchCreateHandler(&#39;PublishingPage&#39;)) { SP.SOD.executeFunc(&#39;sp.ui.dialog.js&#39;, &#39;SP.UI.ModalDialog.showModalDialog&#39;, function() { var dlgOptions = { url:&#39;\u002fsites\u002fknowledge\u002fBestPractice\u002f_layouts\u002f15\u002fCreatePublishingPageDialog.aspx&#39;, autoSize: true, autoSizeStartWidth: 550 }; SP.UI.ModalDialog.showModalDialog(dlgOptions); }); };" href="#" class="ms-textXLarge ms-heroCommandLink">  
    <span class="ms-list-addnew-imgSpan20">  
      <img class="ms-list-addnew-img20" src="/_layouts/15/images/spcommon.png?rev=23">  
 </span>new page  
 </a>  
 </div>  

4. Publish the page.

SharePoint: Show all files which have no checked in version

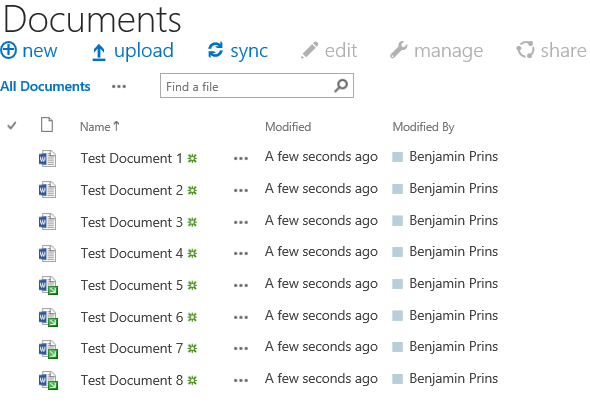
With SharePoint 2010/2013 and the “Check in – Check out” feature enabled documents may seem to disappear and reappear for users without a cause. A common scenario is that colleague 1 saved a document on SharePoint but colleague 2 is unable to find it. While Colleague 1 can still see and find the document. This is a common and a very frustrating situation. This happens when a new file is stored on SharePoint but does not yet have a checked in version. This can happen when multiple files are uploaded to SharePoint and a required column is not filled in or when the setting Require Check Out is enabled. The file(s) will be stored on SharePoint but will be check out and only visible for the up-loader. There is a way for every user to see these hidden checked out documents.

Colleague 1 sees Colleague 2 sees
All documents Check in documents

 
Solution

1. Open the document library where the documents are missing.
2. Click in the ribbon on Library – Settings – Library Settings.
3. Click on Manage files which have no checked in version.
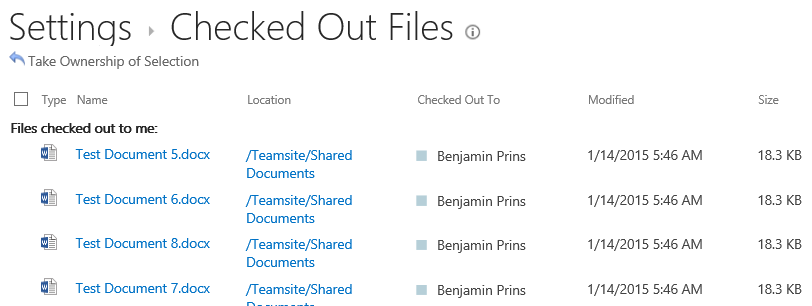
4. All the documents without a checked in version will be displayed.
Checked Out Files
5. If needed the user can take over the ownership and check in the document.

SharePoint Online: Search refiners and searchable columns

Adding search refiners and creating searchable columns with SharePoint Online is a little bit different then with SharePoint 2013 on premise. In this blog post I will explain how to add search refiners and how to make custom columns searchable. There are 5 major parts we need to implement;

  • Create a custom column
  • Add some content
  • Map a crawled property to a refinable managed property
  • Created the alias
  • Configure the refiners

Solution

1. Create your custom column, for example Product.
2. Create some content with the custom column.
3. Wait for the column to be added as a crawled property, this might take up to 24 hours.
4. Open the SharePoint admin center and click on Search.
SharePointAdminCenter
5. Click on Manage Search Schema.
6. Depending on the type of column you will need to use different type of preset Managed Properties.

Managed property name Data type for mapping
RefinableDate00 – RefinableDate19 Dates.
RefinableDecimal00 – RefinableDecimal09 Numbers with max three decimals.
RefinableDouble00 – RefinableDouble09 Numbers with more than three decimals.
RefinableInt00 – RefinableInt49 Whole numbers.
RefinableString00 – RefinableString99 Strings, Person or Group, Managed Metadata, Choice and Yes/No

7. Search the related type on Managed Property.

RefinableString01
8. Click on Edit Map Property in het drop-down menu.
9. Add the Crawled property of the custom column, in our example it will be ows_Product.
AddMapping
10. Fill in the alias, this will make the column searchable.
11. Save the changes.
12. Close the SharePoint admin center and open the search center result page.
13. Set the page in edit modus and edit the Refinement web part.

EditRefinerWebPart
14. Click on Choose refiners… and add the managed property, in this example RefinableString01
15. Change the display name to the custom columns name, otherwise the refiner will be shown as RefinableString01
16. Search for some content and enjoy the result!

Result

SearchRefinerResult2