SharePoint Online: Document dropdown navigation

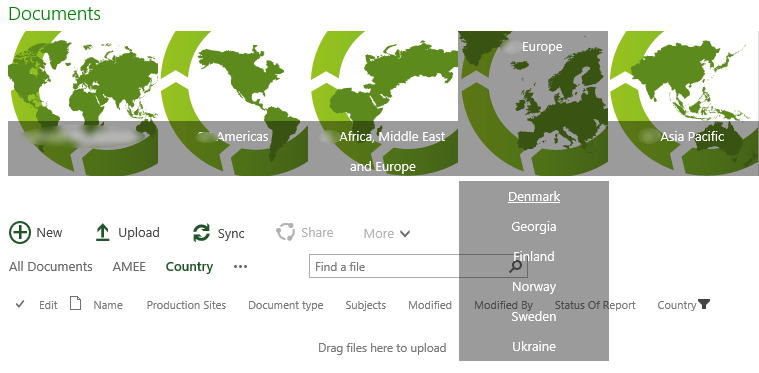
An international customer needed a good looking and user friendly navigation solution for a large set of documents. Users search for documents related to the region and country they work in. So we created an easy and good looking navigation focused on the regions and countries. The navigation element is added to the 5 region views and on the country view, allowing the users to easily navigate between regions and countries. The user hovers over a regions and the related countries will be shown.
Solution

The solution consists of two main parts, the country view with filter and the navigation element. First I will explain how the country view works, followed by the navigation element.

Country view

The country view uses an query string (URL) filter that is added to the view page. This filter takes the value of the parameter Country out of the URL and filters the document based on this parameter.

  • Add the Query String (URL) Filter to the page.
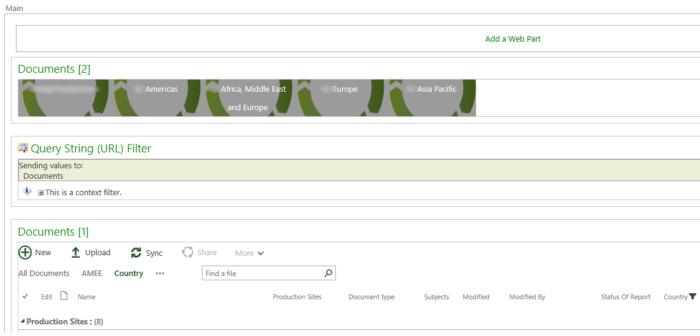
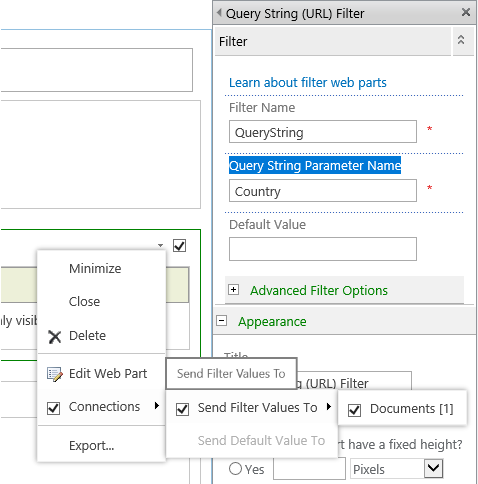
  • Set the Query String Parameter Name to Country.
  • Configure the Web part connection to send filter values to the document library.
  • The documents will be filtered when you add the parameter with a value to the URL
    ?country=Denmark+(DK)
    

Navigation element

The navigation element consists of three parts, JavaScript, CSS and the HTML.

  • Store the JavaScript, CSS and the HTML file on SharePoint.
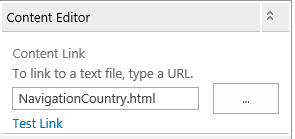
  • Add a Content Editor Web Part to the country view page.
  • Link the HTML file in the Content Link Setting
  • The HTML page show the structure of the navigation, the pictures, links etc.
  • The CSS file provided the looks.
  • The JavaScript is used to activate the hover.

JavaScript and CSS working together

JavaScript controls the hover function (mouseenter and mouseleave), the hover is active on all elements (div) with the class top.
Only div’s with a region picture have the class top set.

  • When the mouse enters the div, JS will add the class active to the div. 
  • When the mouse leaves the div, JS will remove the class active from to div.
$(document).on({
    mouseenter: function () {
        console.log('mouse-in');
        $(this).addClass('active');
    },

    mouseleave: function () {
        console.log('mouse-out');
        $('.top').removeClass('active');
    }
}, '.top');

When the class active is added the corresponding CSS is applied to the div, resulting in:

  • The dropdown (div with URLs) will be shown.
    • The div is hidden by default.
      display: none;
      
  • The overlay on the region div will be set to full.

.top.active .bottom-container { 
	display: block;
}

.active.top > a > .title {
	height:150px;
	top: 0;	
}


SharePoint JSLink: Custom field view on form

With JSLink you have the ability to quickly and easily change how a list views and forms are rendered. In this example I will explain how to change a field or fields located in the view, display, new or edit forms. The advantage of only changing the look and feel of specific fields is that all the default features and functions will remain functional. For example paging will still work and you will not need to create custom paging.

Solution

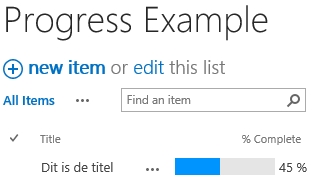
In this solution I will change the look and feel of the default % complete column.

  1. Create a custom SharePoint list called Progress Example.
  2. Add the default % complete column.
  3. Save the JSLink Percentage Complete to SharePoint.
  4. Link the JSLink to the form on new, edit, display and view web parts.
  5. The view and display form will be shown as a progress bar with the exact number shown.
  6. The edit en new forms will be shown as a progress bar that you change with the exact number shown.

Explanation

  1. The JSLink overrides the default rendering of the percentage complete (% complete) column.
  2. Each column and form that needs a different rendering needs to be linked to the new render function.
    You can link multiple forms to one function.
  3. In the following code the view and display column are linked to the same function called percentCompleteViewDisplayFiledTemplate.
  4. The edit and new form are linked to the function called percentCompleteEditFiledTemplate.
    (function  ()  
        // Create object that have the context information about the field that we want to change it's output render  
       var overrideNameField  =  {};  
       overrideNameField.Templates  =<  {};  
       overrideNameField.Templates.Fields  =  {  
            // Apply the new rendering for Priority field on List View 
            "PercentComplete": {    "View": percentCompleteViewDisplayFiledTemplate,
                                    "EditForm": percentCompleteEditFiledTemplate,
                                    "NewForm": percentCompleteEditFiledTemplate,
                                    "DisplayForm": percentCompleteViewDisplayFiledTemplate
            }
         };  
         SPClientTemplates.TemplateManager.RegisterTemplateOverrides(overrideNameField);
    })(); 
    
  5. In the functions you can rewrite how the column is rendered.
  6. The function percentCompleteEditFiledTemplate rewrites the rendition.
    // This function provides the rendering logic for New and Edit forms for percentage complete column
    function percentCompleteEditFiledTemplate(ctx) { 
     
      var formCtx = SPClientTemplates.Utility.GetFormContextForCurrentField(ctx); 
     
        // Register a callback just before submit. 
        formCtx.registerGetValueCallback(formCtx.fieldName, function () { 
            return document.getElementById('inpPercentComplete').value; 
        }); 
     
        return "<input type='range' id='inpPercentComplete' name='inpPercentComplete' min='0' max='100' oninput='outPercentComplete.value=inpPercentComplete.value' value='" + formCtx.fieldValue + "' /> <output name='outPercentComplete' for='inpPercentComplete' >" + formCtx.fieldValue + "</output>%"; 
    } 
    
  7. The result is an input slide bar instead of the default text box.

SharePoint JSLink: Paging

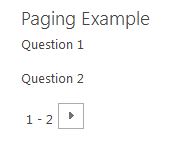
When you use JSLink not all default SharePoint list features will be generated automaticly, for example paging will not be available. When you require paging you need to code this yourself. In this example I will create an example list with no custom styling besides the custom paging.

Solution

  1. Create a custom list called Paging Example with a title field.
  2. If required changed the fields to be shown.
  3. Create a page and add the Paging Example web part to the page.
  4. Create the JSLink file called BasicPaging.js
  5. Link the JSLink to the web part to load the BasicPaging.js

Explanation

  1. The JSLink overrides the default Templates (Header, Item and Footer).
  2. The paging has been added to the Footer template.
  3. The following variables are used to get the first and last row and the previous and next hyperlinks.
    var firstRow = ctx.ListData.FirstRow;
    var lastRow = ctx.ListData.LastRow;
    var prev = ctx.ListData.PrevHref;
    var next = ctx.ListData.NextHref;
    
  4. The following code will render the paging are required and uses the default SharePoint classes and images.
    var footerHtml = "<div class='Paging'>";
    footerHtml += prev ? "<a class='ms-commandLink ms-promlink-button ms-promlink-button-enabled' href='" + prev + "'><span class='ms-promlink-button-image'><img class='ms-promlink-button-left' src='/_layouts/15/images/spcommon.png?rev=23' /></span></a>" : "";
    footerHtml += "<span class='ms-paging'><span class='First'>" + firstRow + "</span> - <span class='Last'>" + lastRow + "</span></span>";
    footerHtml += next ? "<a class='ms-commandLink ms-promlink-button ms-promlink-button-enabled' href='" + next + "'><span class='ms-promlink-button-image'><img class='ms-promlink-button-right' src='/_layouts/15/images/spcommon.png?rev=23'/></span></a>" : "";
    footerHtml += "</div>";
    footerHtml += "</div>";
    return footerHtml;  
    

SharePoint Online: Search tips and tricks

SharePoint Online can store large volumes of all kinds of information, form project documents, to personal documents, to video’s and lots more. Finding the correct information can become harder and harder over time. With SharePoint search and my 8 tips you will be able to find the correct content faster than before.
1 Search scope

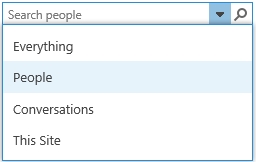
SharePoint search uses default and custom search scopes. Search scopes are used to narrow down the search area, generating fewer and better results. Select a search scope to focus the search result. For example, when searching for a colleague select the search default search scope People.

2 Refinement panel

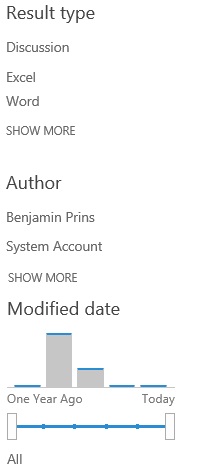
When SharePoint presents the results you can narrow down the results by filtering the results with the refinement panel. Common refinement options are result type, author and modified date. Custom refinement options can be added by the administrator.

Refinement planel

3 Wildcard

If you are not sure about the spelling or you are searching for variations of a term you can use the wildcard symbol *. Wildcards widen the search results, this will help find data that is similar to the search term.

Examples

  • Budget* to search for all items starting with the word budget.

4 Quotes

Use double quotes “” to find exact phrases if you are sure about the phrases.
Example: “Department budget 2017”

5 Commands

You can use search commands (Boolean operators) to narrow or expand the search results. Note that all SharePoint search commands need to be writing in capitals.

OR Use OR to expand your search to include more terms. The returned search results include one or more of the specified free text expressions or property restrictions
NOT Use NOT to narrow your search results. The returned search results don’t include the specified free text expressions or property restrictions.
AND  Use AND to narrow your search results. The returned search results include all of the free text expressions.
+  Use + to narrow your search results. The returned search results include all of the free text expressions.
Use – to narrow your search results. The returned search results don’t include the specified free text expressions or property restrictions.

Examples

  • “Project plan” OR “Business Case”
  • Department -Budget
  • “Project plan” AND Review

6 Specifying properties

When searching for information you can specify which type of information (also known as properties or metadata) you are looking for.  Metadata or properties are the data that to describe the content and is used when storing or filtering the searh results. SharePoint captures by default a lot of metadata such as author, filename, title and last modified date. The main purpose of using metadata is to make sure all the content stored in SharePoint can be found easily.

A basic property search consists of the following three parts: a property name a operator and a value.

<Property Name><Property Operator><Property Value>

Example:

  • Author:Benjamin
  • filename:”Budget Report”
  • filename:Project*

7 Value and Property restrictions

When using properties to narrow down the search results it is possible to make the search query even more specific with the use of different property restrictions. The most used and best known is the : operator. When using the : operator the returned results will all be equal to the specified value . There are a lot more operators available a few examples are:

Operator Description Example
: Returns results where the value is equal to the property value (short description) Author:John
= Returns results where the value is equal to the property value Title=Projectplan
< Returns results where the value is less then the property value Created<9/02/2017
> Returns results where the value is greater then the property value Created>9/02/2017
<= Returns search results where the property value is less than or equal to the value specified in the property restriction Modified<=9/02/2017
>= Returns search results where the property value is greater than or equal to the value specified in the property restriction. Modified>=9/02/2017
<> Returns search results where the property value does not equal the value specified in the property restriction. Title<>Testfile

SharePoint supports more Search operations for SharePoint Online. See the full list of the property operators on Keyword Query Language (KQL) syntax referene.

8 Try again

The best tips when searching for information is that if you did not find the correct document, change the search query a bit. Add or remove commands, terms and properties. Not all documents will be found with the first attempt.

Supporting links

SharePoint JSLink: Multiple web parts on a page

With JSLink you have the ability to quickly and easily change how a list views and forms are rendered. Together with jQuery, CSS and even JavaScript you can present a SharePoint list in endless ways. JSLink works very well when you only one web part with a custom JSLink located on a page. The default behavior with multiple web parts on a page is that all web parts will use the JSLink. This is counter intuitive since we set the JSLink on one web part. With the solution below we can make sure that only the correct web part use the custom JSLink code. The solution is created in cooperation with Peter van Koesveld.

Solution

This solution works for a page where one web part needs to be modified by the JSLink.

  1. Create a JavaScript file with the following code: JSLinkMultipleWebParts.
  2. Change the if statements to match the name of the list.
    if (ctx.ListTitle == "ListTitle")
    
  3. Change the headerHtml, ItemHtml and footerHtml to show the list as required.
  4. In the example the Title field will be displayed, make sure this field is available.
  5. Save the JavaScript file to SharePoint.
  6. Set the JSLink property.

Explanation

  1. The JSLink overrides the default Templates (Header, Item and Footer).
  2. Then if the ListTitle equals the provided ListTitle the custom code is run for the header, Item and Footer.
  3. If the ListTitle does not match the default RenderTemplate will be used.
    function renderItem() {
        if (ctx.ListTitle == "ListTitle") {
            //CustomItemRender
        } else {
            //Return the default Item Template
        	return RenderItemTemplate(ctx);
        }
    }
    
    • RenderHeaderTemplate
      return RenderHeaderTemplate(ctx);
      
    • RenderItemTemplate
      return RenderItemTemplate(ctx);
      
    • RenderFooterTemplate
      return RenderFooterTemplate(ctx);
      

SharePoint JSLink: Accordion

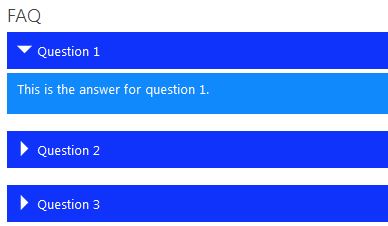
With JSLink you have the ability to quickly and easily change how a list views and forms are rendered. Together with jQuery, CSS and even JavaScript you can present a SharePoint list in endless ways. In this example I will create a FAQ list with a accordion display style.

Solution

  1. Create a custom list called FAQ with a title and description field (Multiple Lines of Text).
  2. If required changed the fields to be shown.
  3. Create a page and add the FAQ web part to the page.
  4. Create the JSLink file called AccordionView.js
  5. Create the JavaScript file called accordion.js
  6. Create the CSS file called accordion.css
  7. Save the background image to SharePoint.
  8. Change the background-image URLs if needed.
  9. Link the JSLink to the web part to load the AccordionView.js.
  10. Add the accordion.js and accordion.css to the page, for example by using a Content Editor web part.
  11. Add jQuery to the page.
  12. Make sure that jQuery is loaded before the other JavaScript. Errors might otherwise be generated.